
Now, one of my deep dark secrets. In my studio space, I have been living with a light like this....

UPDATE! It seems as though not everyone has heard of a boob light. I feel it is my duty to educate. This, my friends, is a boob light. I will let the picture be enough of an explanation:

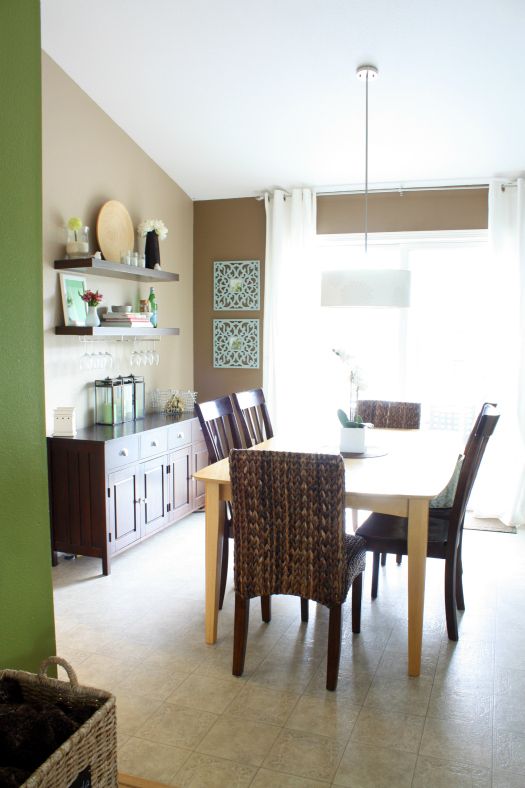
So, I talked the hubs into switching it out with our kitchen drum pendant {since it has three bulbs which meant a little extra light for me}, and updating the light fixture in the kitchen to a chandelier with five bulbs, which meant extra light in the kitchen. Win win!

So, I was left with a blank slate white drum pendant again...

The plan was to follow one of the bajillion tutorials on the www to recover the shade with a pretty green fabric {this one specifically}
I started by very carefully removing the white trim at the top and bottom. I wanted the fabric to cover smoothly.

Then we measured the drum shade...

And measured the fabric, leaving a one inch margin on each side and using a piece of trim to draw straight lines with a pencil.

As far as knowing the length of fabric that we would need, we just used the ribbon trim that we had removed, as a guide.
The next step was to iron over a nice edge...

And use a small amount of hot glue to affix it right at the seem of the drum pendant.

The next step was easier than I thought it would be. A little spray adhesive, roll, smooth, more spray adhesive, roll some more, smooth it out and keep going...

Once I got all the way around, I ironed over a nice edge again and hot glued it down.
Now with the one inch extra on each side of the drum pendant, I just pressed it down over the lip of the pendant frame. It still had spray adhesive, so it stuck down nicely.
I used an exacto knife to very carefully slice my fabric right under the lip of the frame. I stress very carefully so that I didn't puncture through the shade itself.

Once the excess fabric was cut out, I used some hot glue to make sure it was secure. Leaving a nice and clean edge inside.


Yes, much better!
I know I am a broken record when I say, "forgive me for the lighting in these photos", but now I am attempting to take pictures of a pretty drum pendant in a dungeon of zero light....


 |
| {found on my pinterest boards here} |
The paint for the dresser has been purchased, as well as the knobs! The corner desk planning is in the works and I finally have a defined color scheme. Something I should have done long ago. So exciting!

0 comments:
Post a Comment