What I love about today's story is that it's real. It shows that with some good space planning and getting creative, IT CAN BE DONE!
Today I get to feature insane inspiration from the wonderful blog, Honey & Fitz!

That's right, the pantry being featured today didn't always look like one out of a magazine or catalog, and it definitely wasn't working to it's full potential!
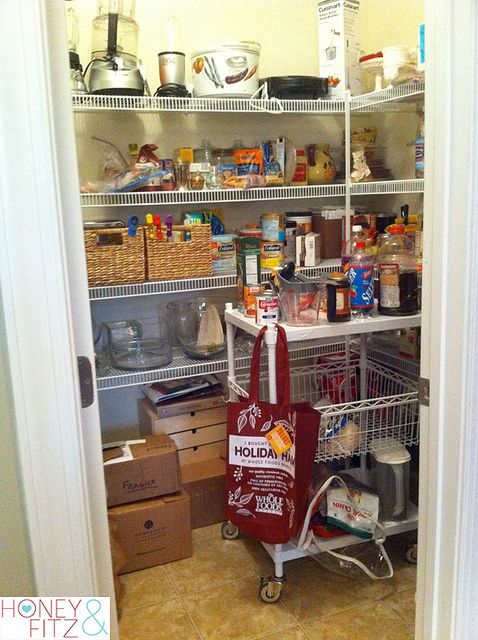
As Dina mentioned on her blog, there were a couple of reasons why this pantry wasn't living up to it's potential.
1. Not Using All of the Vertical Space: The shelves ended three feet short of the ceiling. That is a ton of storage space that wasn't being utilized!
2. Stationary Shelves: Stationary shelving assumes that everything you will be storing is the exact same height. That NEVER happens. Stationary shelving wastes a ton of space since things like canned goods and boxes of cereal and bags of chips are typically different sizes, and the items that come and go within a pantry space are never the same.
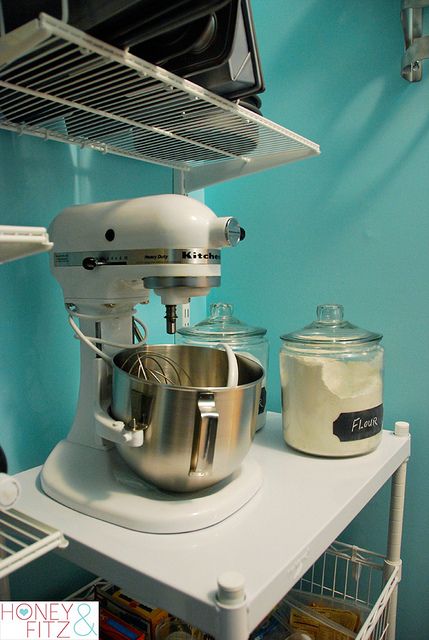
3. There is a mixer on the floor: A mixer is a serious investment. And not utilizing the pantry effectively causes it to land on the floor. No good.

Dina started out one of the best ways anyone can start out when tackling a drawer, a closet or an entire room. She EMPTIED IT! This is always my method as well. So much easier to sort, purge and only put back the essentials. It gives you a fresh look at things. It allows you to see the space differently and put things back where they belong and make sense vs. where they have always been. And when I say she removed everything, I meant it. Nothing was left, not even the shelving. And once everything was out, she gave it a fresh coat of incredible blue paint!

And this is when the powers of the internet come in. In only three days, the new pantry looked like... THIS:
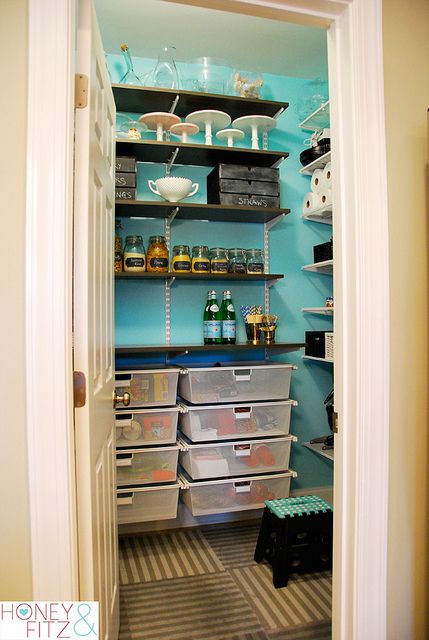
The new pantry configuration is a combination of solid shelves on one wall and ventilated shelves on the other {all the way up to the ceiling!}. It is a great mix of utility and pretty! And that counter height deep shelf over the drawers is a fantastic work space!
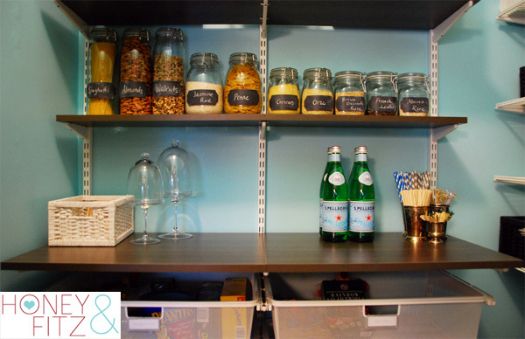
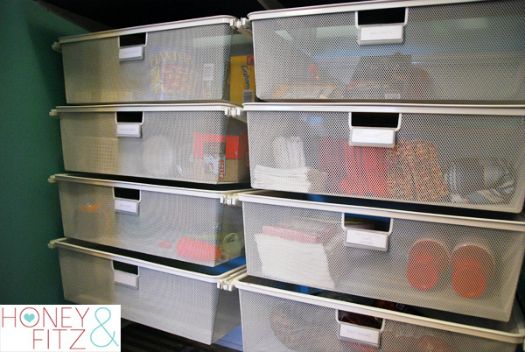
The drawers are great for stashing the odd sized boxes of crackers, bags of chips, sports drink mixes, paper goods, linen napkins, etc...
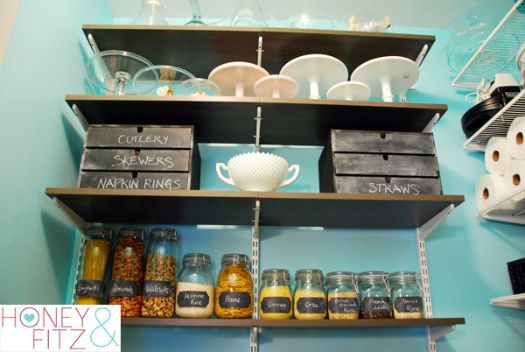
The shelves above hold Dina's collection of milk glass cake pedestals. So pretty!

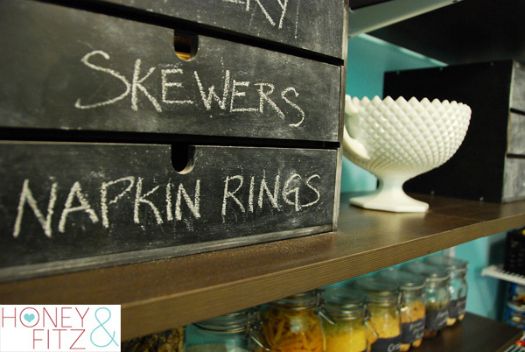
One of my favorite things that she did was paint a pair of IKEA Fira boxes {sadly discontinued} with chalkboard spray paint, and they now hold random odds and ends!!
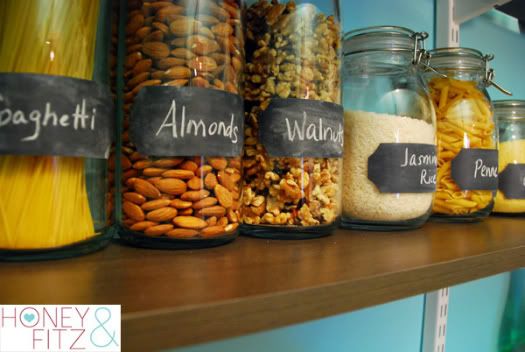
She used an assortment of IKEA Slom containers keep things like pasta, rice and lentils fresh and air tight. She did quite a bit of research on air tight food storage before landing on these. And how perfect are the wallies she found to label the jars? I have can't believe I have never seen those before!
Most of their canned goods and small appliances live on the other wall with ventilated shelving. Here's a floor to ceiling view. A nice low shelf holds all of her small appliances. No more straining to get them down! And because the elfa system is so flexible, she was able to space the shelves just right to accommodate them. No wasted space. Love that!

To organize the baking sheets and pans, she used elfa's shelf separators {normally used to corral folded sweaters and t-shirts}. It worked perfectly!

And her mixer? It now has a permanent home on a white InterMetro cart from the Container Store that she has made her baking station. I love that she can wheel the cart right out of the pantry, plug in the mixer and do all of her baking without ever having to pick up the mixer at all!

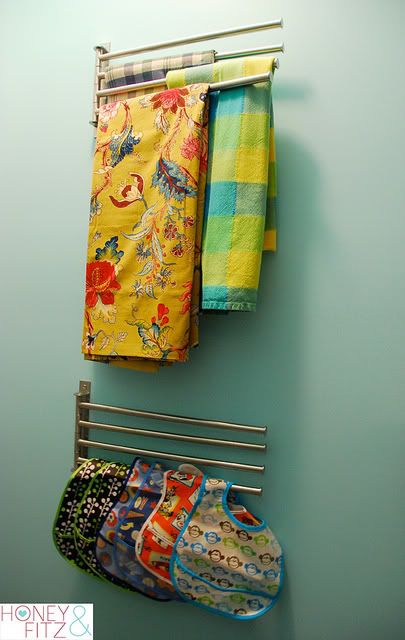
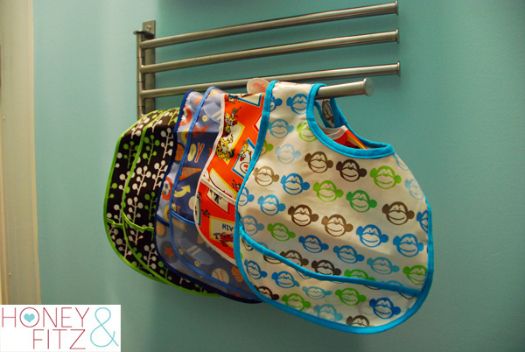
Behind the door she installed these IKEA Grundtal towel holders. They have a super low profile, take up barely any room and are a great spot to hold tablecloths and bibs! Could this setup be any smarter?

So to honor all the smart thinking and hard work that was put into the space, I think we should take a moment to gawk at those before and after pictures one more time!
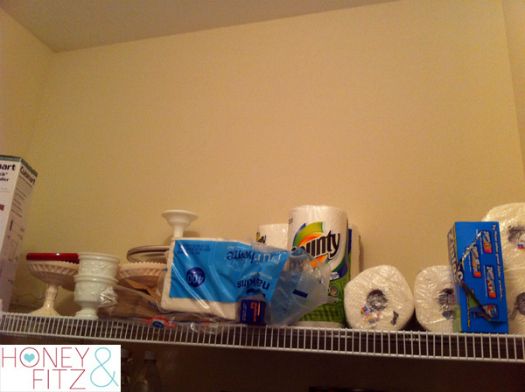
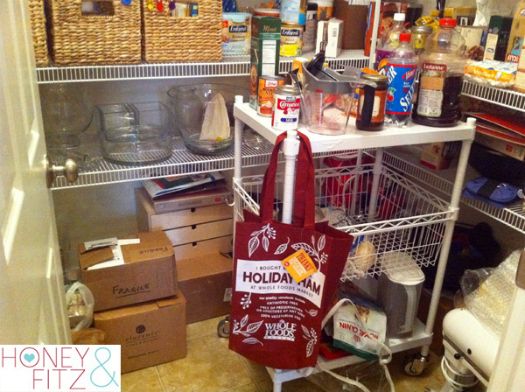
Before:
After:
Before:
After:
Yep, I am in total awe and pantry love. And because I know it wasn't done in some staged warehouse, but in a real home. And the planning and use of space and is purely genius. Everything works together and is a combination of function and beauty. You can read the full story and snag all of the details right here on the Honey & Fitz blog.
Once you cool down from being all hot and bothered by the bliss you just encountered, let's take a minute to chat about why this space rocks! What ideas are you going to snag up for your own home? Who is grabbing a can of paint and brush? How about chalkboard spray paint or rails for linens and bibs?

ATTENTION!! Want to be featured in a Reader Space edition? Have an awesome organizing story to share? I am looking for projects that have made a positive impact to your life. Please send your story and photos to iheartorganizing@gmail.com and I would heart to feature them right here, on the blog!! Photos should be high resolution and un-editted. Please include a description of the project, including any costs, inspiration, and how it has changed your life and routine for the better! Oh, and no worries my friends, we will NEVER judge "before" pictures because that just wouldn't be nice! Only love goes on at this blog! More Info HERE.
0 comments:
Post a Comment